
Step-by-step install
This guide takes you from nothing to one Windows PC protected by Kestrel and visible in the console. Every screenshot on this page was taken while following these exact steps: a fresh clone of the GitHub repository on a Linux server, and a Windows 11 PC.
Plan for about 30 minutes.
Start with a test PC
The agent can kill processes, quarantine files, block network access and plant decoy files. Install it on a test PC or virtual machine first, not on someone's work laptop. Roll out to real users only after a test period in Audit mode (see Next steps).
What you need
| Item | Notes |
|---|---|
| A server with Docker | Linux (Ubuntu 22.04 or 24.04 recommended) with Docker Engine and the Compose plugin, or a Windows PC with Docker Desktop. 2 vCPU and 4 GB RAM are enough for up to about 100 PCs. |
| A name or IP for the server | The PCs must reach it on TCP 443 (console and installer download) and 8443 (agent connection). |
| A Windows 10 or 11 PC, 64-bit | The PC you will protect. You need an administrator account on it. |
KestrelAgent.msi | The agent installer. See step 2. |
Part A: start the server
1. Download Kestrel and create the settings file
On the server:
git clone https://github.com/lawbyte/kestrel-edr.git
cd kestrel-edr/deploy
cp .env.example .envgit clone https://github.com/lawbyte/kestrel-edr.git
cd kestrel-edr\deploy
Copy-Item .env.example .envOpen .env in a text editor (nano .env on Linux, notepad .env on Windows) and set these four values:
| Setting | What to put |
|---|---|
KESTREL_MASTER_KEY | A random key. Create one with the command below. Keep a copy somewhere safe: without it a restored backup cannot be read and every PC has to be enrolled again. |
KESTREL_PUBLIC_HOSTNAME | The DNS name or IP address the PCs use to reach this server, for example edr.example.com or 192.168.1.20. You can list several, separated by commas; the first one is written into the installers. |
POSTGRES_PASSWORD | A long random password. |
CLICKHOUSE_PASSWORD | Another long random password. |
Create the random values:
openssl rand -base64 32    # use as KESTREL_MASTER_KEY
openssl rand -hex 24 # use as POSTGRES_PASSWORD, run again for CLICKHOUSE_PASSWORD$b = New-Object byte[] 32; [Security.Cryptography.RandomNumberGenerator]::Create().GetBytes($b); [Convert]::ToBase64String($b)2. Put the agent installer next to the server
The server hands out the agent installer to your PCs, so it needs a copy of KestrelAgent.msi in deploy/installers/. Get the MSI in one of two ways:
- Download it from GitHub Actions (needs a free GitHub account): open Actions, workflow ci, click the latest run with a green check on
main, scroll to Artifacts, download kestrel-windows and unzip it. - Build it yourself on Windows: see Build from source.
Then copy it into place:
mkdir -p installers
cp ~/Downloads/KestrelAgent.msi installers/KestrelAgent.msiNew-Item -ItemType Directory -Force installers | Out-Null
Copy-Item $HOME\Downloads\KestrelAgent.msi installers\KestrelAgent.msiThe agent binaries are not code-signed yet
Microsoft Defender can flag the unsigned agent. Until a signed release is available, add a Defender exclusion on each PC before installing (step 8).
3. Start the server
Still in the deploy folder:
docker compose up -d --buildThe first start builds the server image and takes about 10 to 20 minutes. Later starts take seconds. Wait until all three containers report healthy:
$ docker compose ps
NAME                       STATUS
deploy-clickhouse-1        Up 11 seconds (healthy)
deploy-kestrel-server-1    Up 5 seconds (healthy)
deploy-postgres-1          Up 11 seconds (healthy)
4. Get the one-time setup code
The server prints a setup code the first time it starts. It proves that the person setting up the console has access to the server:
docker compose logs kestrel-server | grep "SETUP CODE"docker compose logs kestrel-server | Select-String "SETUP CODE"... first-run setup pending: enter this one-time setup code in the console (KESTREL SETUP CODE: AROP-XG2Q-CQ8T)Your code will be different. If your firewall is on, allow TCP 443 and 8443 now.
Part B: set up the console
5. Create your organisation and administrator account
Open https://<your server name>/ in a browser. The server starts with its own certificate, so the browser warns that the connection is not private: choose Advanced, then Continue. (For production, install a trusted certificate, see TLS.)
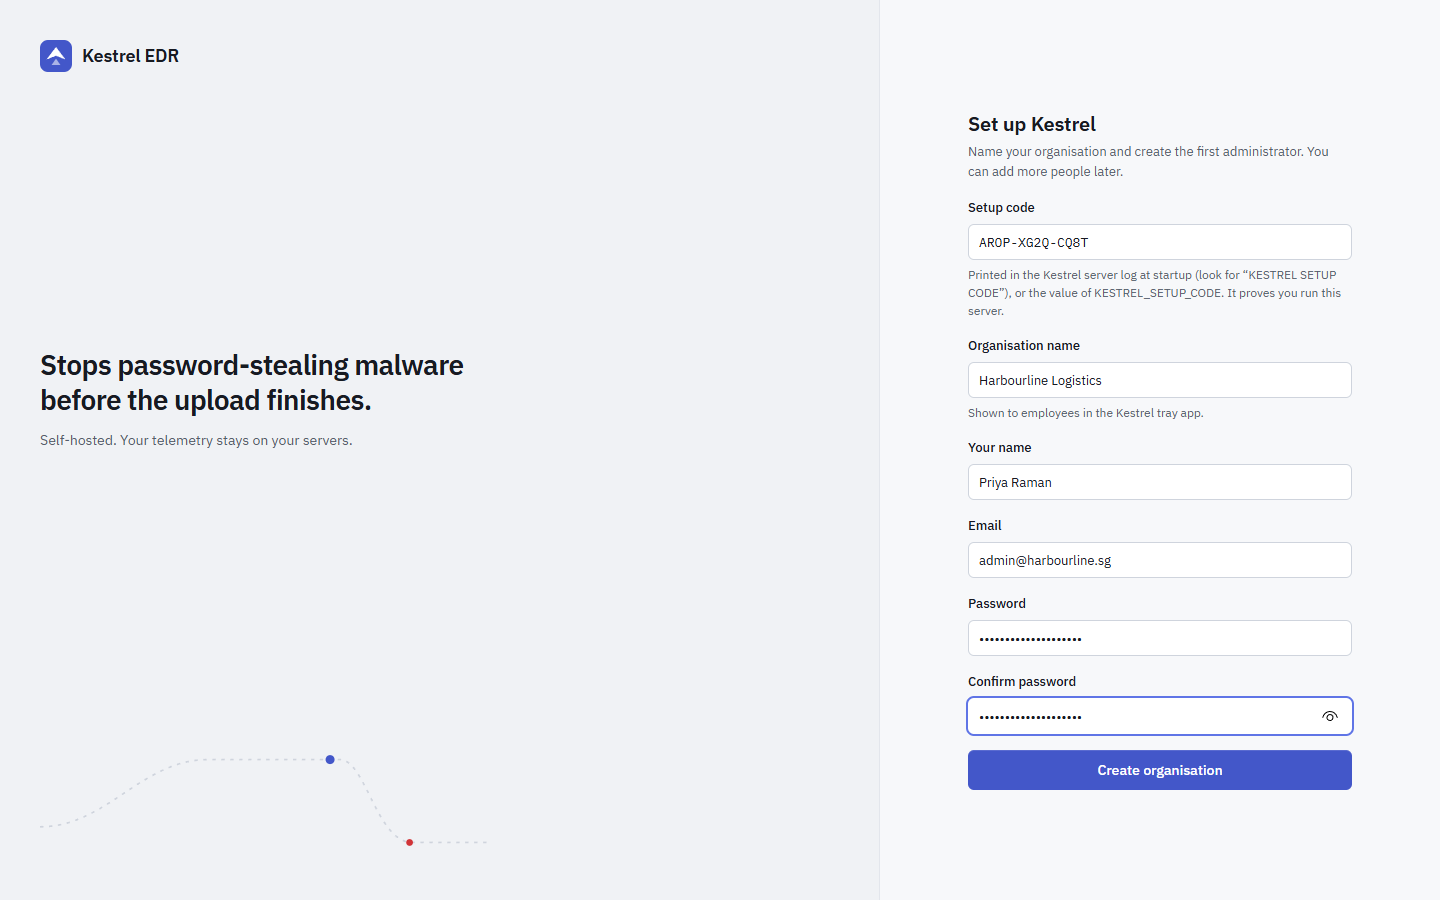
Fill in the setup form: the setup code from step 4, your organisation name (employees see it in the Kestrel tray app), your name, email and a password. Click Create organisation.
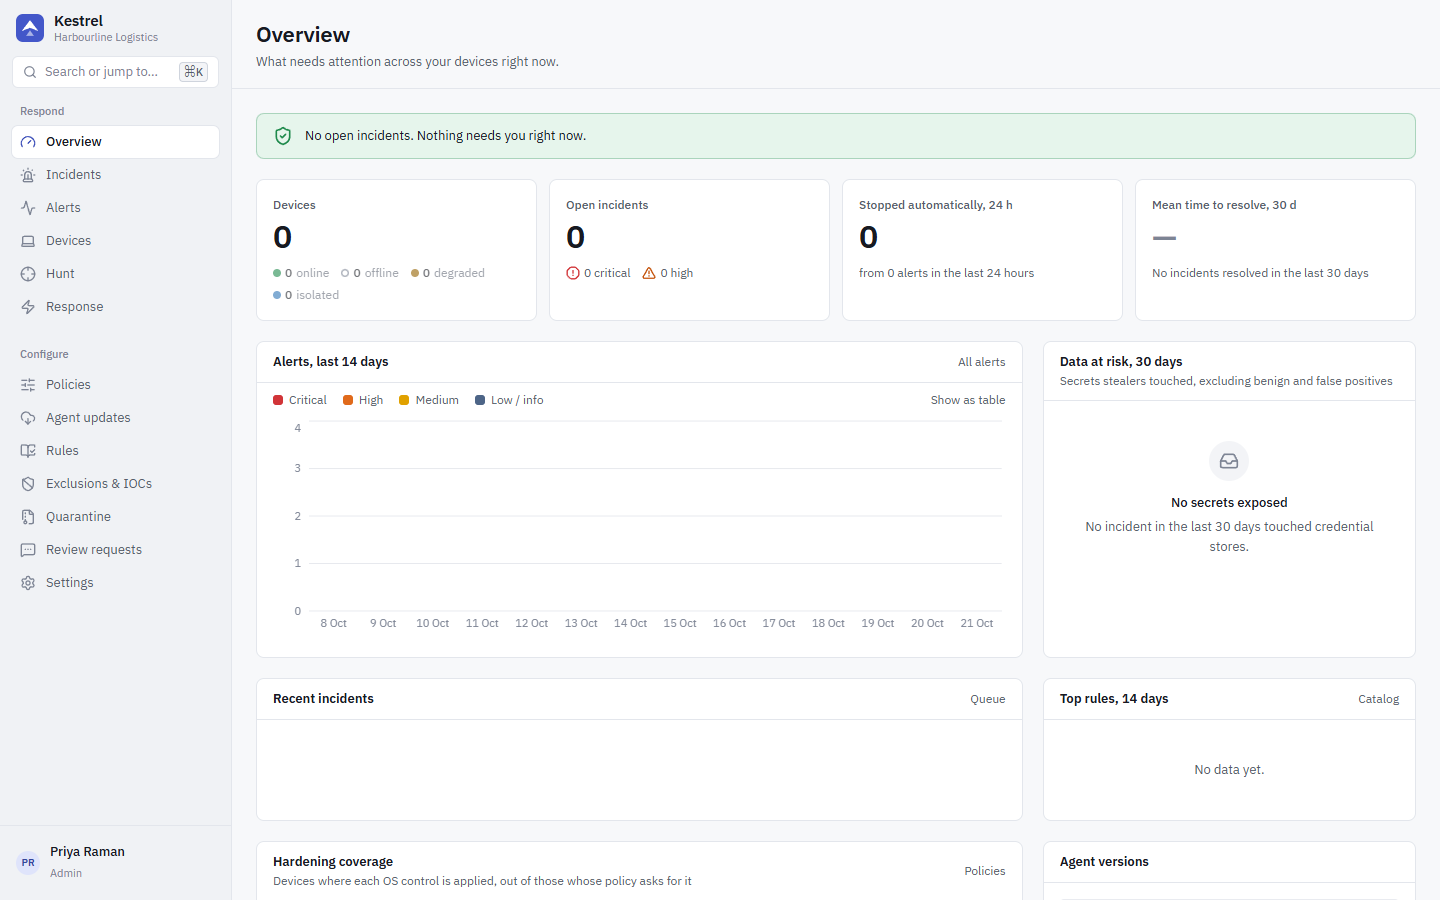
You are signed in and see the empty overview:
Turn on two-factor authentication now
Open your name at the bottom left, then Account & security, and set up an authenticator app. See Two-factor authentication.
Part C: create an installer
6. Open the install wizard
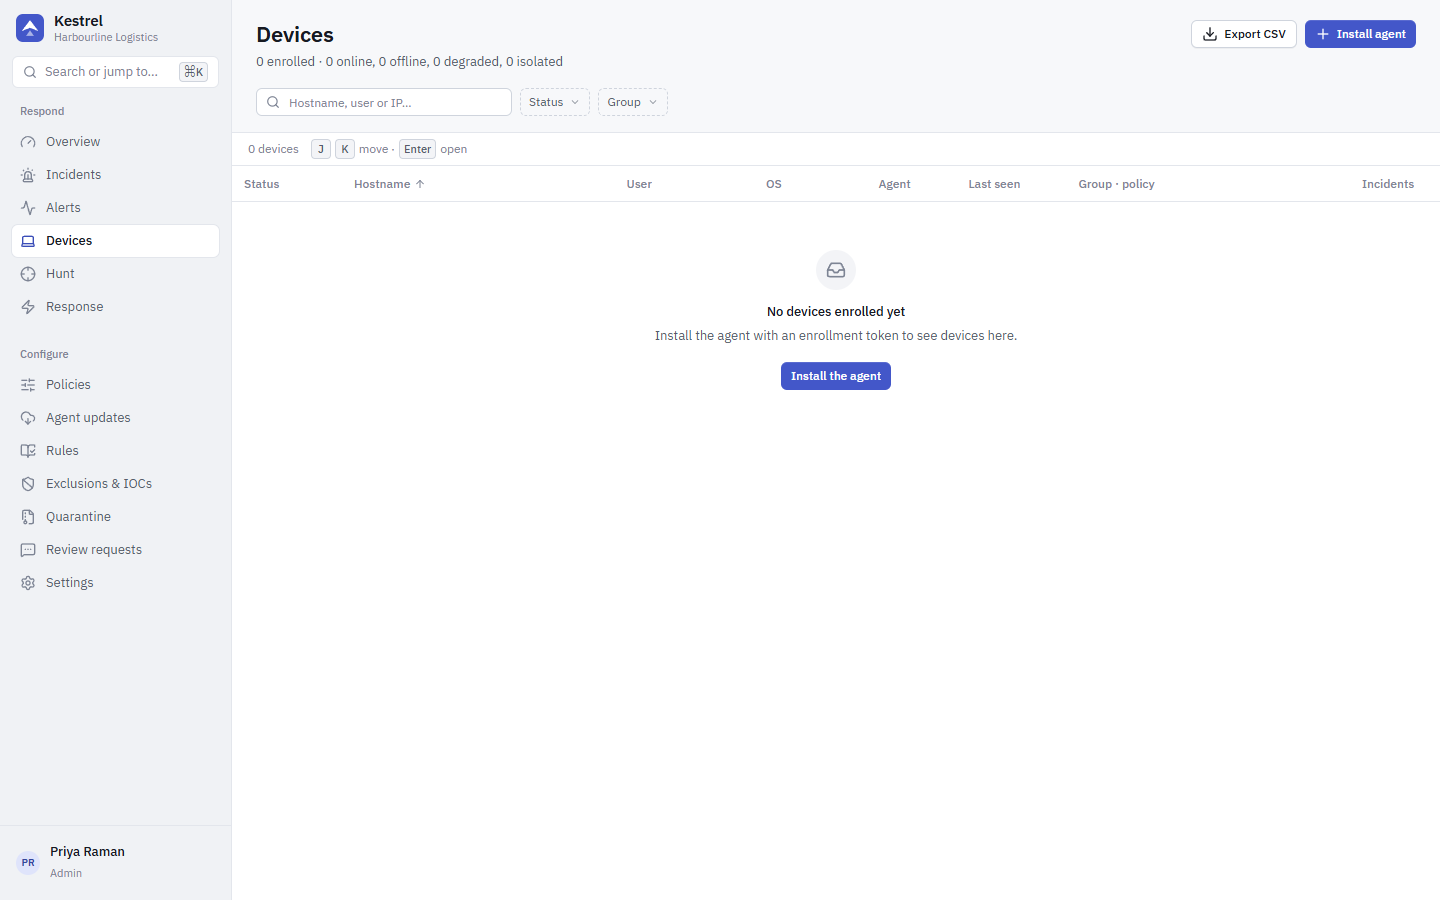
Click Devices in the left menu, then Install agent at the top right.
7. Choose what IT may do on the PCs
The wizard has three steps.
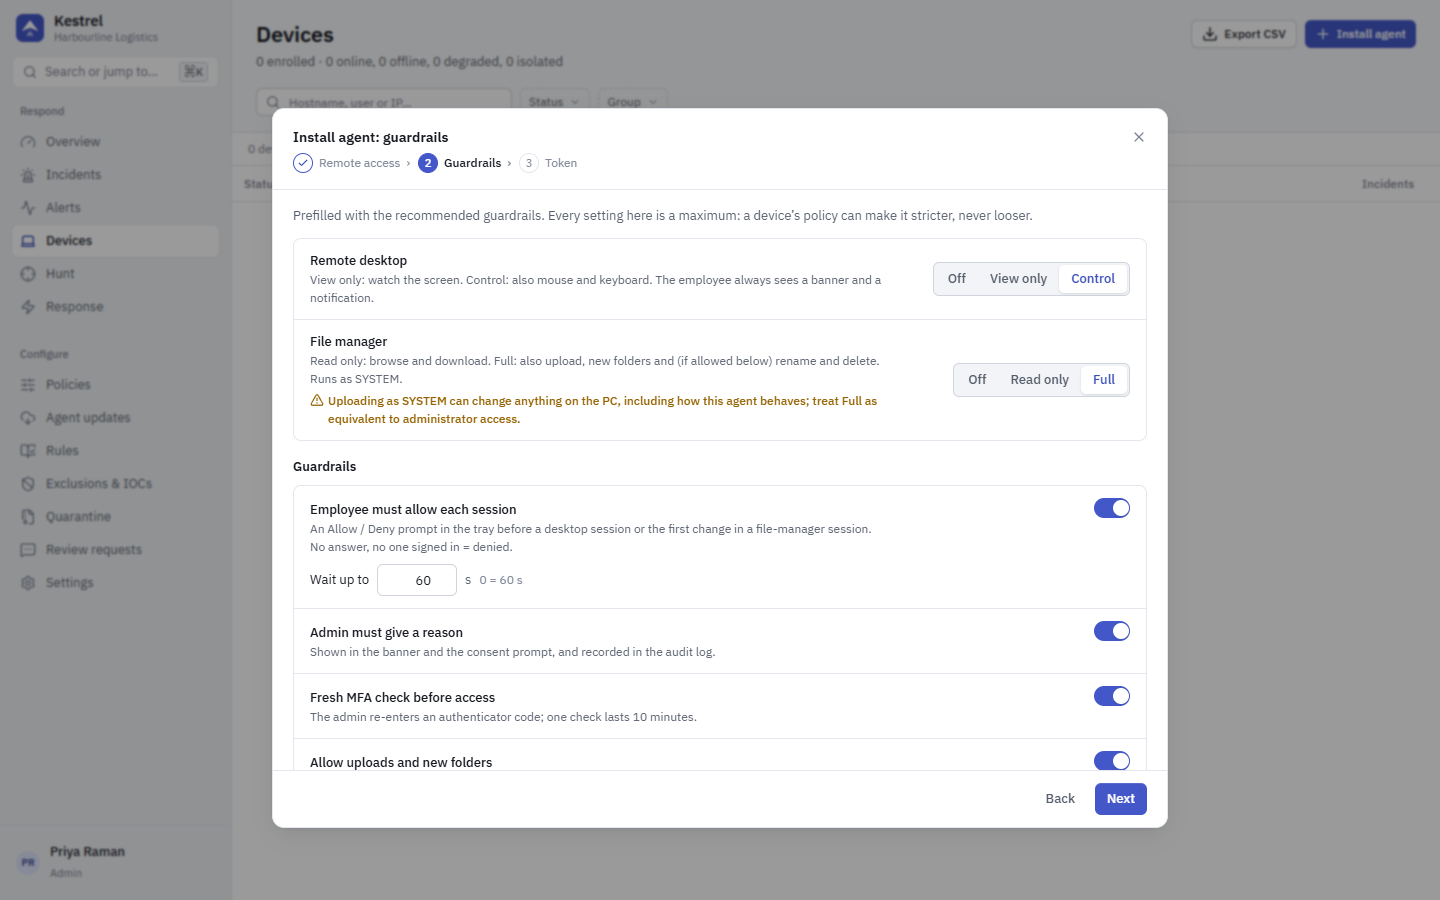
Remote access. Choose what IT can do on PCs installed with this installer. This is fixed on each PC when it installs; you can later make it stricter through a policy, but never looser. If you are not sure, choose No remote access; detection and response work the same with every choice.
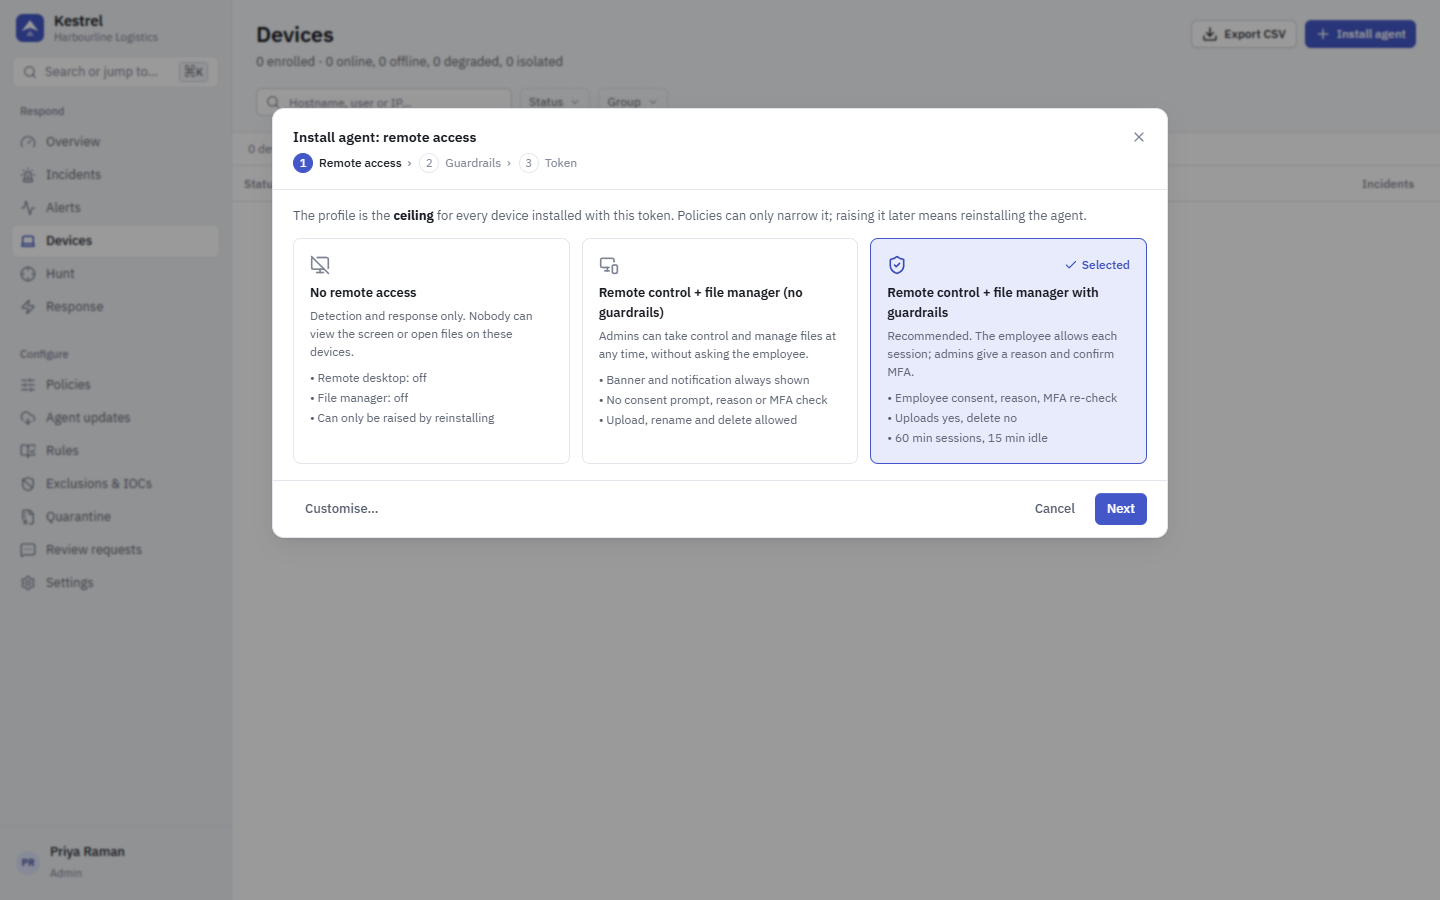
Guardrails. Only shown for the profile with guardrails: whether the employee must allow each session, whether IT must give a reason, session time limits and so on. The defaults are a sensible start.
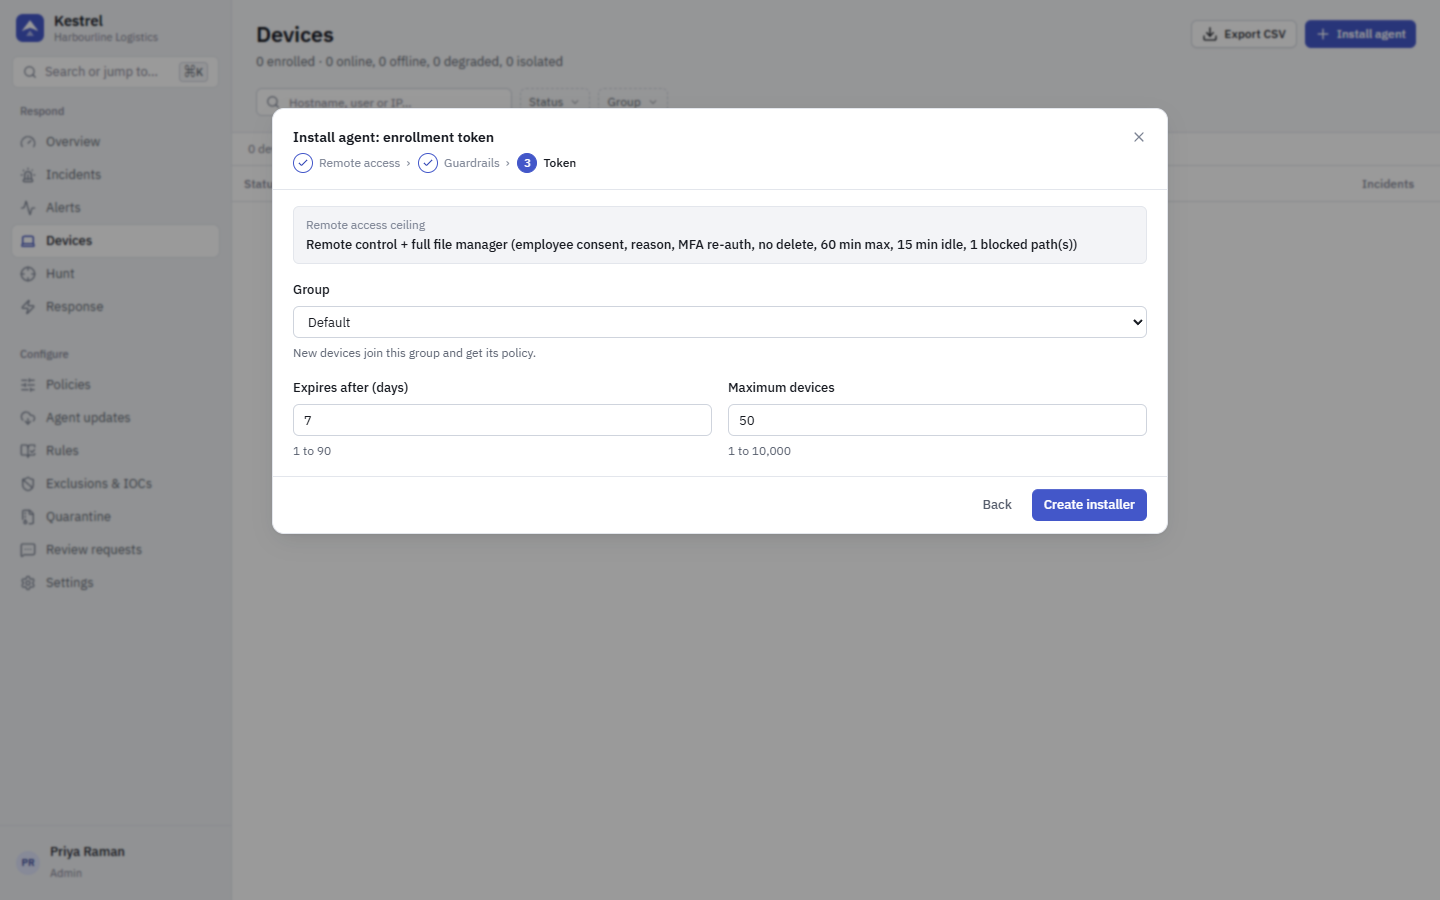
Token. Pick the device group, how many days the installer stays valid and how many PCs may use it. Click Create installer.
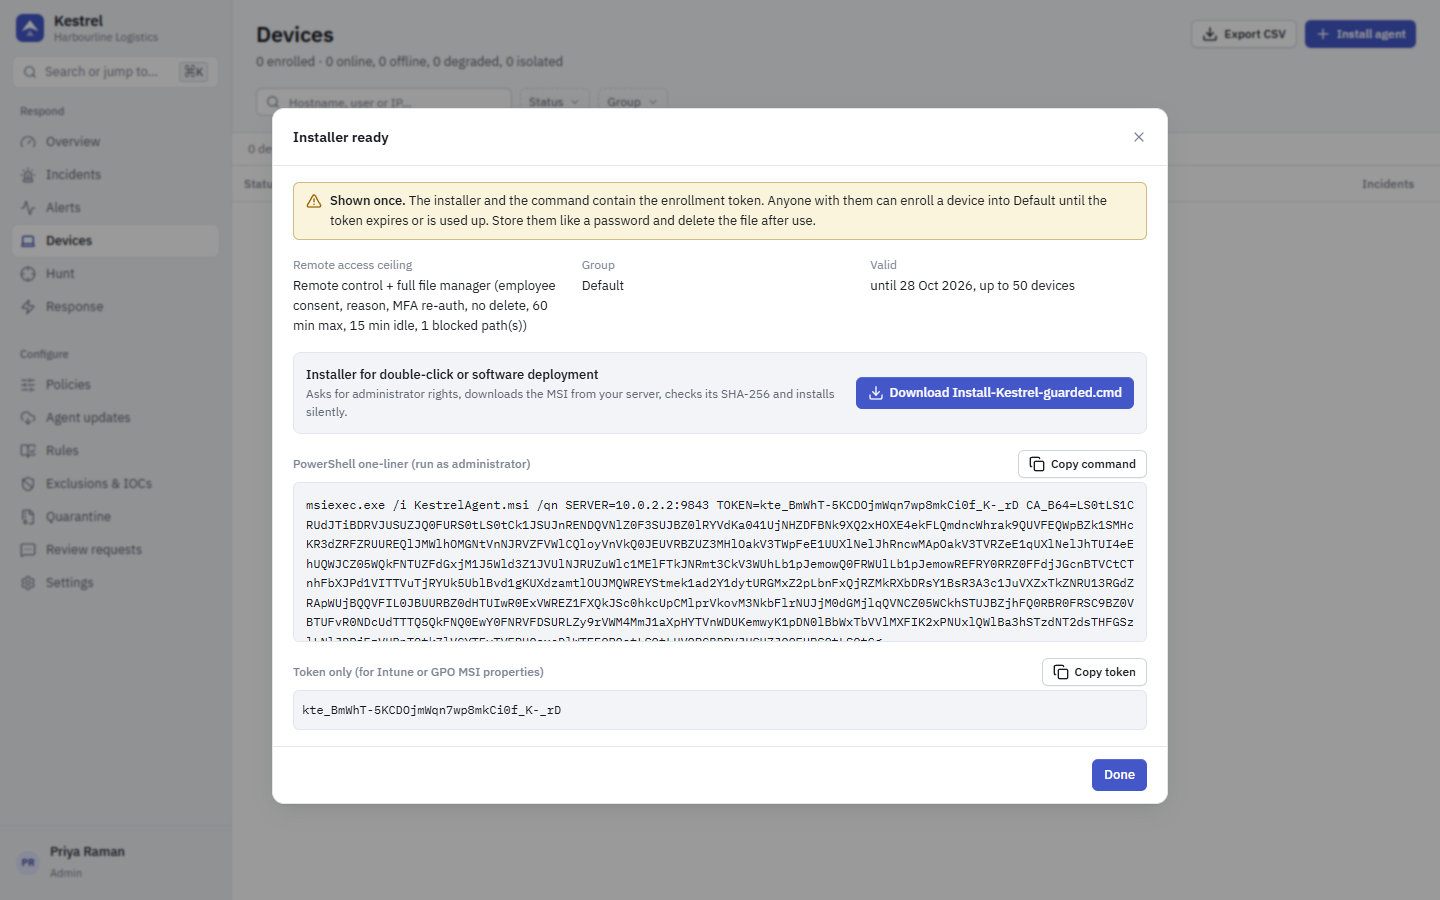
The installer is ready. Click Download Install-Kestrel-....cmd. The file contains an enrollment token, so treat it like a password and delete it when you are done. It is shown only once.
Part D: install on the employee PC
8. Add the Defender exclusion (unsigned builds only)
On the PC, open PowerShell as administrator (right-click Start, Terminal (Admin)) and run:
Add-MpPreference -ExclusionPath 'C:\Program Files\Kestrel'To do this for many PCs, push the same exclusion with Group Policy or Intune.
9. Run the installer
Copy the downloaded Install-Kestrel-....cmd to the PC (USB stick, network share or email to yourself) and double-click it.
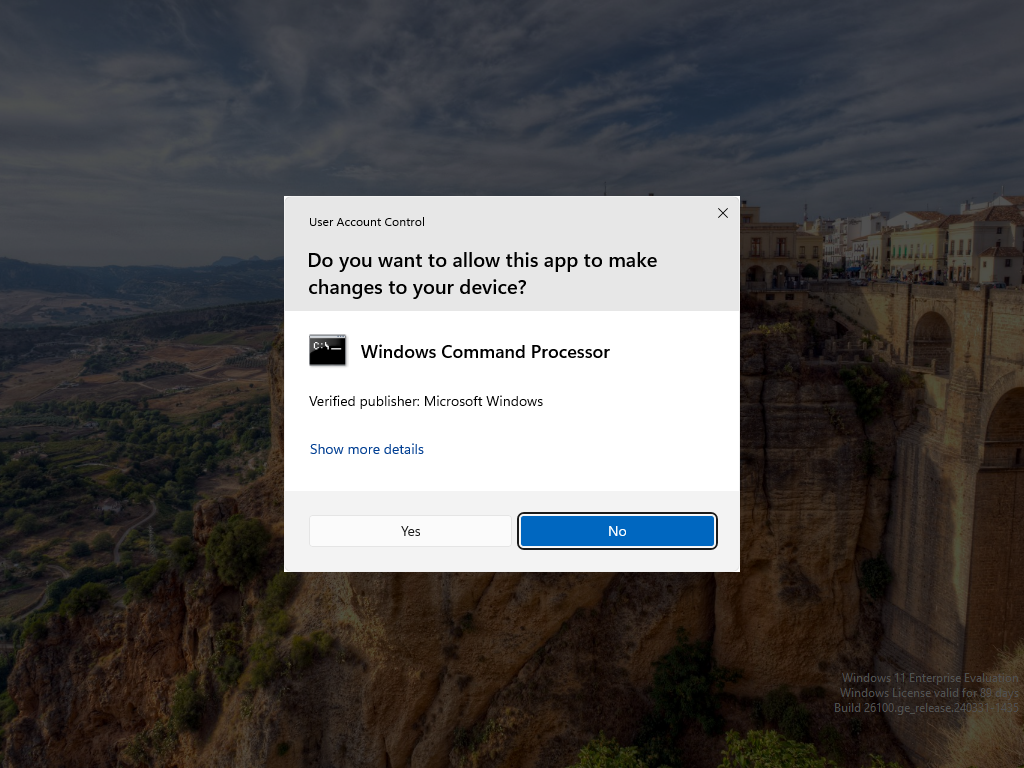
Windows asks for administrator rights. Click Yes. If you are signed in as a standard user, Windows asks for an administrator's name and password instead.
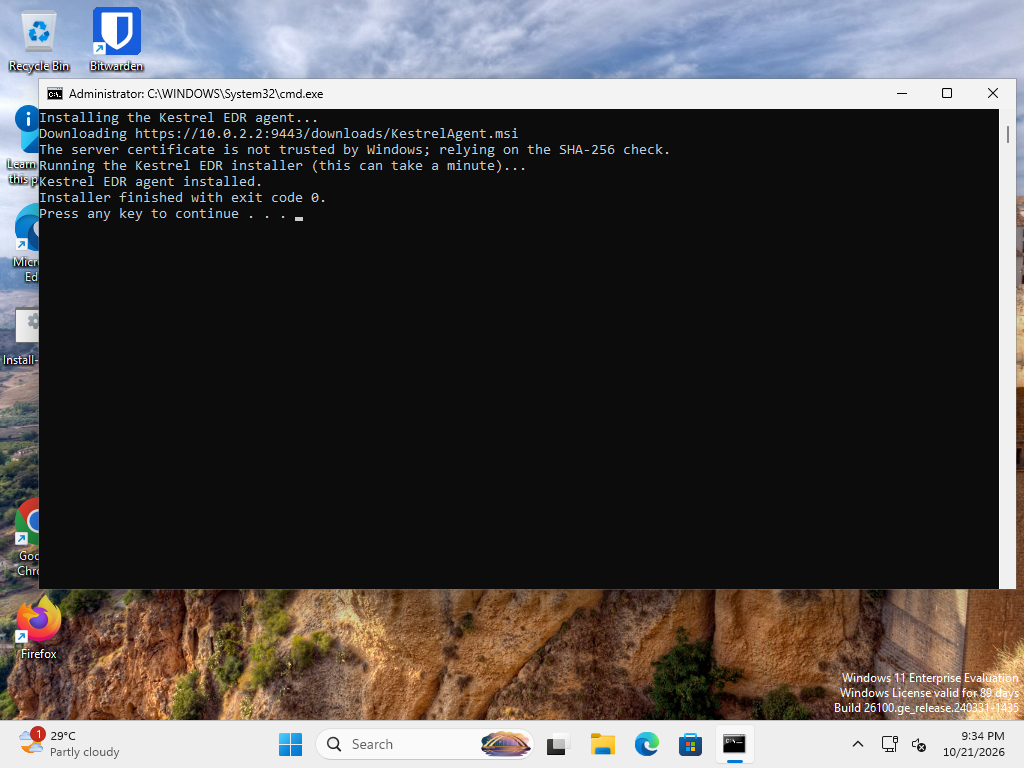
A window shows the progress. The installer downloads the MSI from your server, checks its SHA-256 fingerprint and installs it:
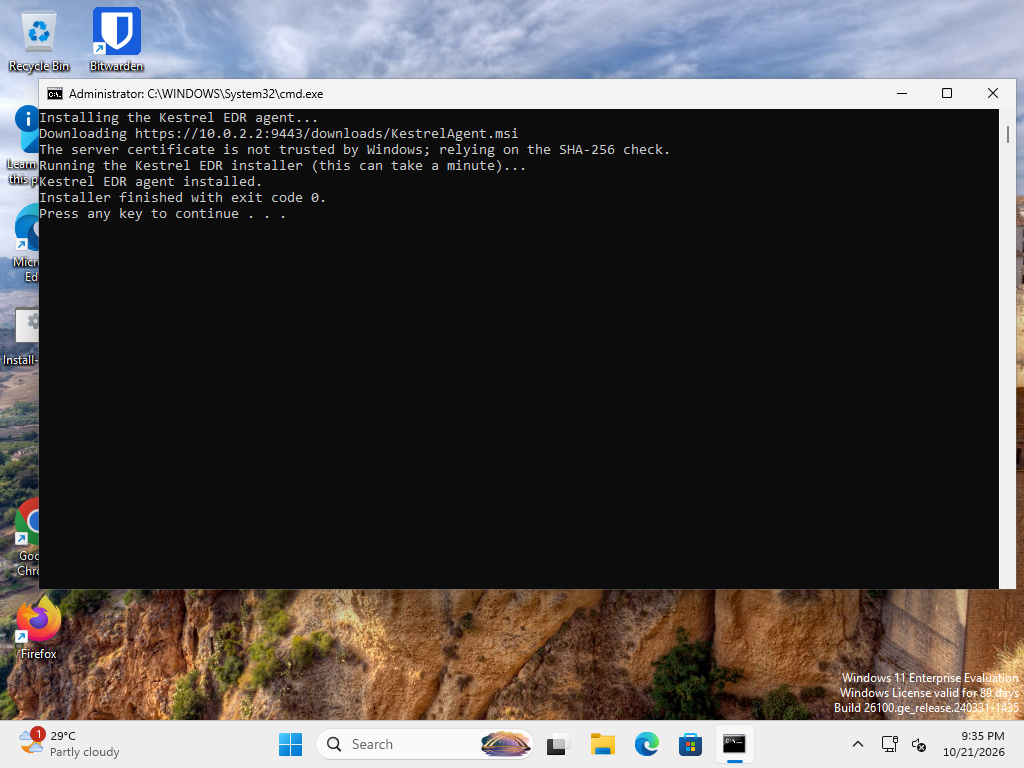
When you see Kestrel EDR agent installed and exit code 0, press any key to close the window.
To install on many PCs without anyone clicking, run the same file from your software deployment tool (Group Policy startup script, Intune, an RMM) as administrator or SYSTEM with the /quiet switch:
Install-Kestrel-none.cmd /quietPart E: check that it works
10. See the PC in the console
Back in the console, open Devices. The PC appears within a few seconds of the install.
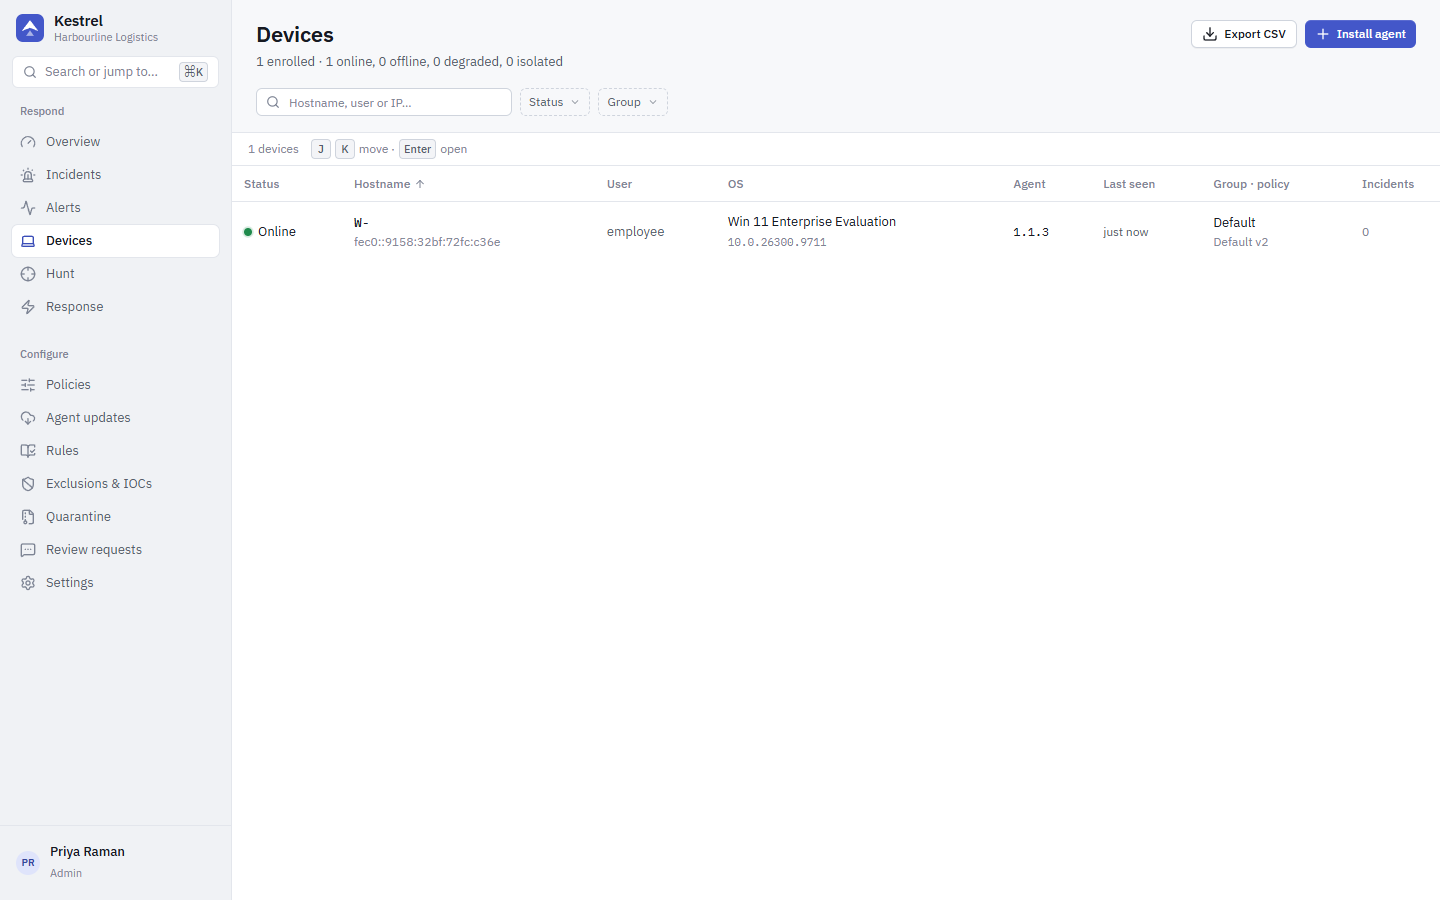
Click it to see its sensor health, policy, remote-access setting and the tabs for events, alerts and response. Green rows are working. Grey rows are optional features that are switched off, such as the DPAPI audit channel, which you can turn on later under Policies, Hardening.
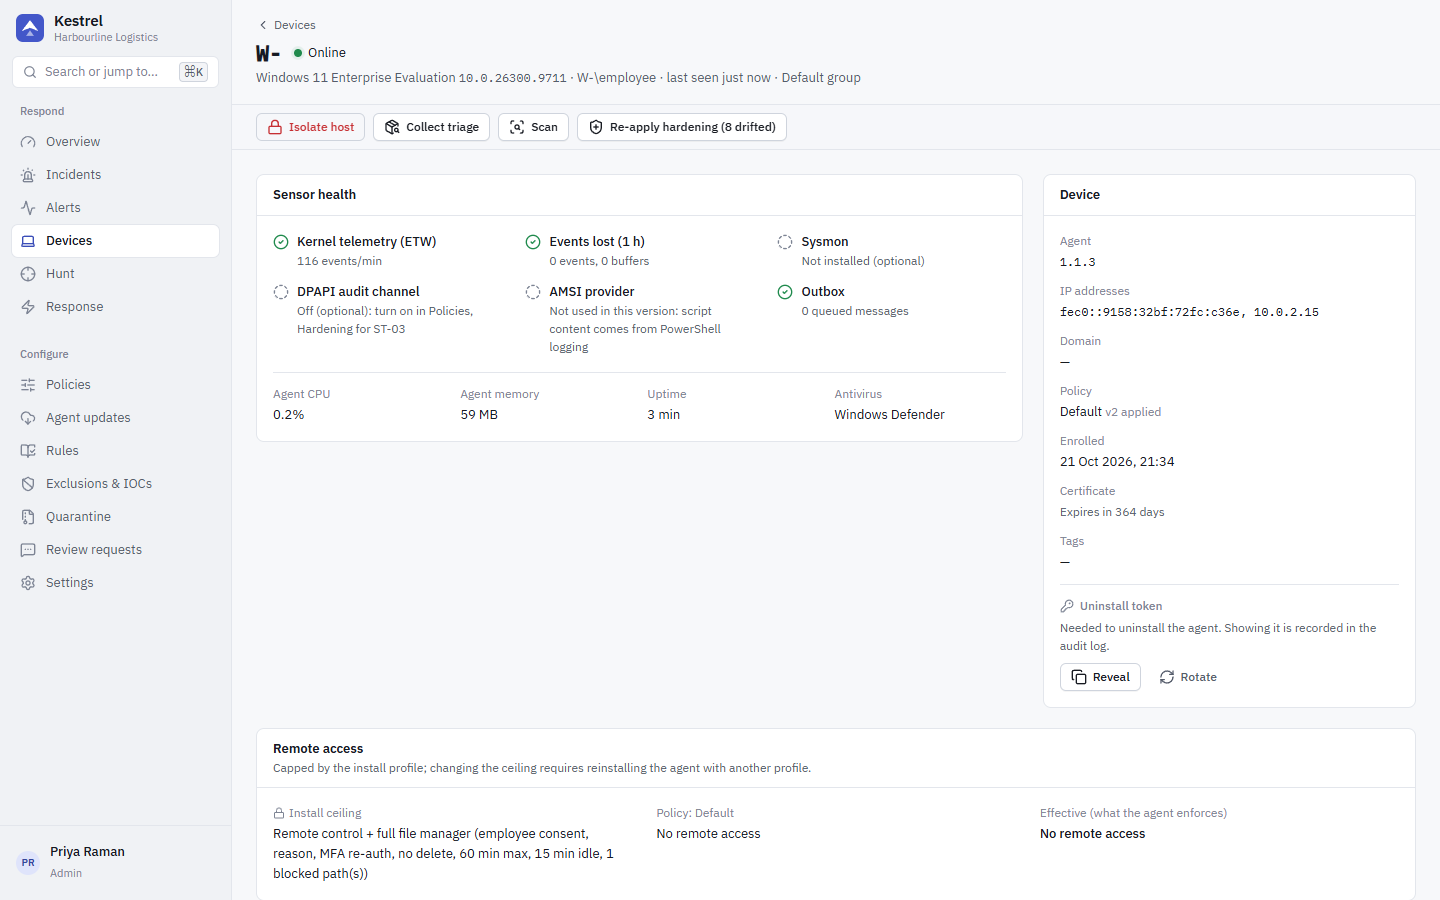
11. What the employee sees
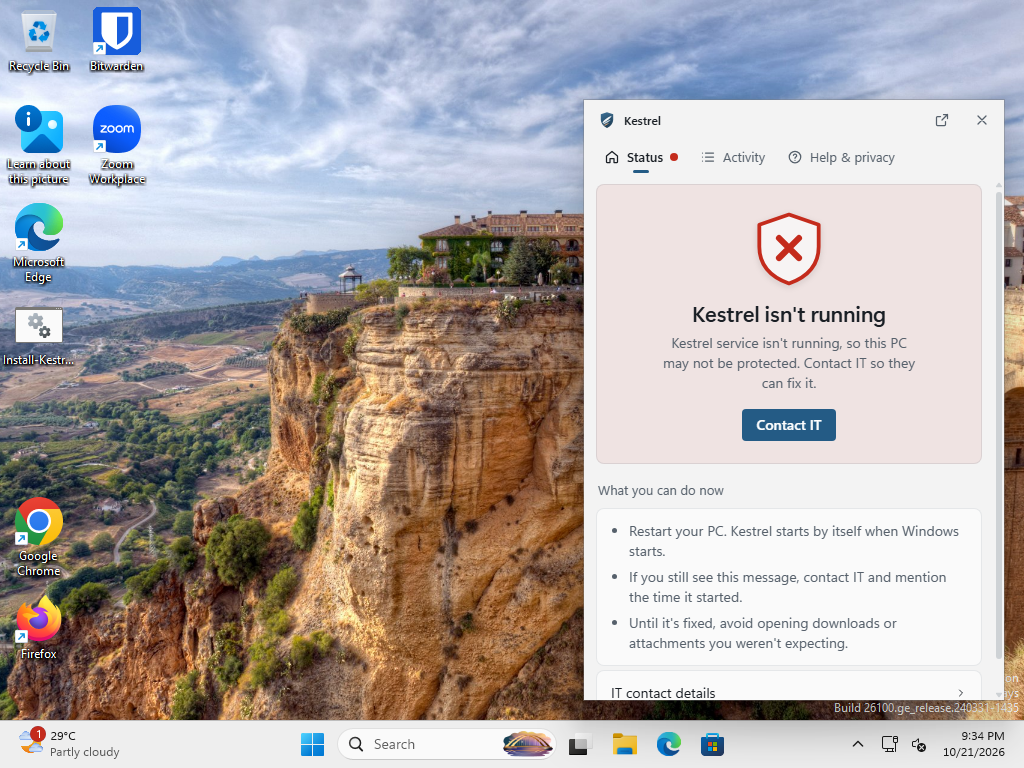
The Kestrel shield appears in the notification area at the next sign-in. Clicking it opens the tray app, which shows the protection status and explains anything Kestrel stopped.
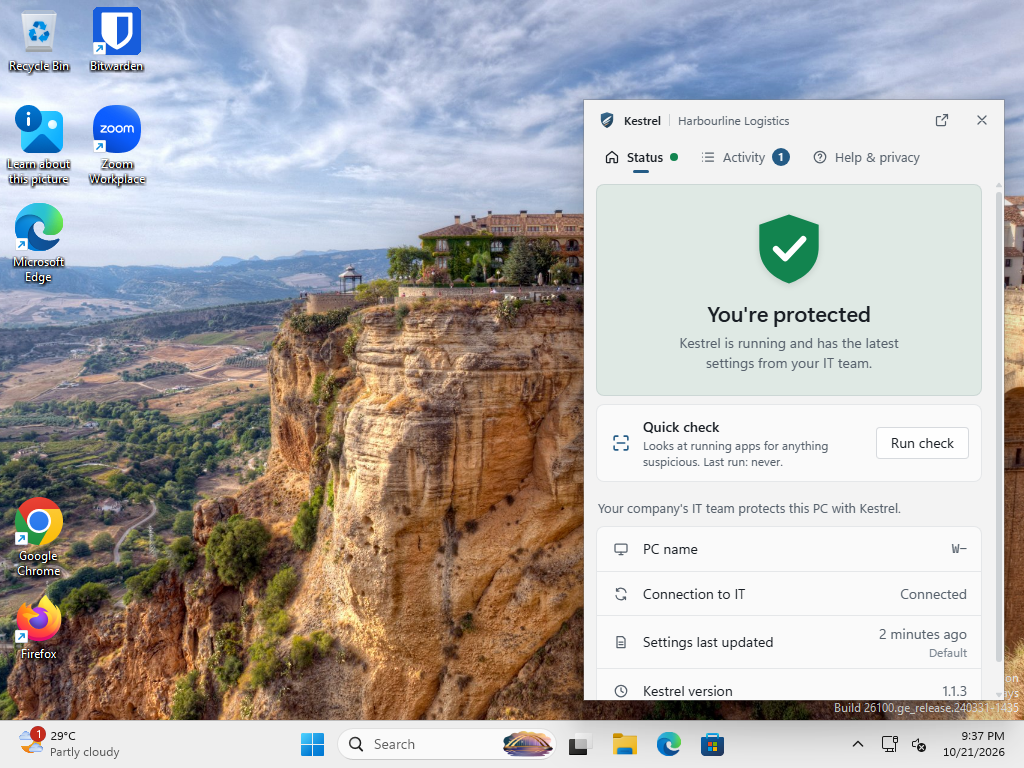
On the PC you can also check the service from an administrator PowerShell:
Get-Service KestrelAgent                                  # Status: Running
& 'C:\Program Files\Kestrel\kestrel-agent.exe' status     # health of the running agent
Next steps
- Roll out carefully. The default policy only stops threats automatically with the rules that are safe on day one. Leave everything else in Audit (alert only) for about two weeks, add exclusions for business software that triggers alerts, then switch rules to Protect one at a time. See Detection rules.
- Try a detection without real malware on the test PC: Testing safely.
- Production setup: trusted TLS certificate, backups, sizing and upgrades in Deploy the server.
- More PCs: deployment tools, upgrades and uninstall in Enroll devices.
Uninstall
Kestrel protects itself against removal. The simplest way is Remove device in the danger zone of the device page: an admin types the hostname to confirm and the agent uninstalls itself, or does so the next time it connects if the PC is offline (see Remove device). Older agents do not support it.
To uninstall on the PC itself you need that PC's uninstall token:
In the console, open the device and click Reveal under Uninstall token. Revealing it is recorded in the audit log.
On the PC, open the Start menu and choose Kestrel EDR > Uninstall Kestrel EDR. Accept the Windows administrator prompt, paste the token and click Uninstall.
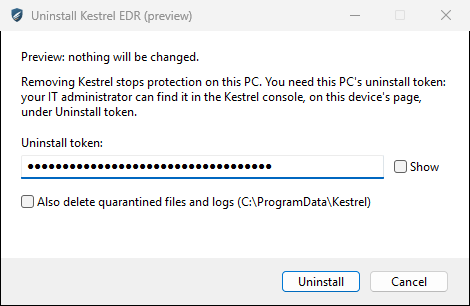
Leave Also delete quarantined files and logs unchecked to keep
C:\ProgramData\Kestrel. If the token is wrong, the window says so and you can paste it again.In the console, open the device and use Decommission device to remove it from the list.
For scripts, the same removal from an administrator PowerShell:
$pc = (Get-ChildItem HKLM:\SOFTWARE\Microsoft\Windows\CurrentVersion\Uninstall | Get-ItemProperty | Where-Object DisplayName -eq 'Kestrel EDR Agent').PSChildName
msiexec /x $pc /qn UNINSTALL_TOKEN=<token>
Removing Kestrel from Settings > Apps stops with a message that points to the Start menu tool.